Learn to easily build earth and simple brick ovens for outdoor bread baking. Detailed step by step instructions accompany the photographs and graphics. No building experience required. When the weather turns really nasty, we'll come indoors and bake in a conventional oven with some simple techniques. Also included are sections on sourdough and no-knead bread baking. From bagels to pita breads to pizzas in your wood-fired oven. It's all here, including historical references that make oven building and bread baking a most enjoyable experience.
To purchase a hard copy go to Amazon CONTENTS Introduction CHAPTER ONE Oven Building A small earth oven A medium size earth oven A simple brick oven Portable dry stack brick oven Zero cost oven The non-oven Fire Oven doors CHAPTER TWO Bread Making The Luscious Loaf: A Sourdough Gem Equipment Flour Guide to ingredients and amounts Sourdough bread baking Sourdough starter Sourdough pancakes Baking with instant yeast (no-knead) Bread in a few hours Coming in from the cold Baking undercover Keeping bread CHAPTER THREE Flatbreads without leavening Flatbreads Essene bread Matzah boards Journey cakes Tex-Mex tortillas Snow bread CHAPTER FOUR Flatbreads with leavening Flatbreads Peter Schumann rye bread Zatar bread Pita bread Celtic muffins \ Earth oven bagels Bialys Onion bread superieur Pizza Molunkan fire bread Walter Lane’s biscuits Orange juice (doing it right) Coffee (doing it right) CHAPTER FIVE Frequently asked questions CHAPTER SIX Photo Gallery Resources Bibliography Index "I have always known That at last I would Take this road, but yesterday I did not know that it would be today." Narihira (translated by Kenneth Rexroth) INTRODUCTION One reason I love to bake bread is because each loaf is different, an adventure in itself. That’s because I’m always experimenting with ingredients and procedures. By pushing the boundaries, I never know exactly where I’m going to end up, and I prefer it that way. I’ve never found a bread baking niche because I’m not looking for one. Rather, I enjoy the discoveries I make and I live with both my failures and successes. The failures I keep for myself and the birds; the best breads I give away. For a long time the loaves themselves were my focus and my challenge, and I wasn’t too much concerned with the subject of bread ovens. Then during a trip to Paris I visited the Poilane bakery on 8 rue du Cherche-Midi. After descending the exceedingly old stone stairs into the cellar, I was privileged to observe a baker at the very large wood-fired oven. Right then I realized that my baking style would change because without doubt, I too, would have a wood-fired oven, only mine would be outdoors. And that’s how I now bake bread, in a manner that has not changed in millennia. When I fire up my outdoor earth oven during any of our four seasons in the Northeast, I enter another dimension. I sense a link between all those who bake in this elemental way and me. Perhaps, you too, want this connection. If constructing your own wood-fired oven interests you, and if you enjoy baking bread or would like to learn how, then you will find useful information here. I don’t pretend to be a renowned expert, but because of the pleasures I’ve discovered in bread baking and oven building, I want to share my learning experiences with you. We’ll be looking at two basic kinds of ovens or variations. One type of oven is constructed with mud and the others with brick. The simple brick ovens I build take less time to construct than the mud ovens, but the materials cost a little more. The ovens are similar in that they all fire with wood, and they all have an incredible capacity to produce unspeakably wonderful breads and pizzas. If they don’t, then you’re doing something wrong, but I’m going to work with you as best I can to help you to get it right. No, you don’t have to be a mason to build the ovens I’m going to describe. Just rudimentary construction skills coupled with desire will suffice. I’m definitely not a mason and masons would smile or cringe at my lack of skill with the trowels, but these gloved hands get the job done quite well. You can choose to have an oven built for you or buy a prefabricated oven. If you decide to do this, you’ll be guaranteed a very fine bakeoven indeed. In the resources section at the end of the book, I’ll make a couple of recommendations. However, a simple oven you construct yourself will bake just as well, at a cost of perhaps a few hundred dollars. To become good at baking, you have to bake a lot and understand some basic principles. We’ll look in detail at the basic principles, but don’t get discouraged if your breads don’t rise to your expectations at first. Expect some failures, but you’ll learn from them. Our focus will be on baking sourdough breads, raised and flat, but we’ll also be making no-knead breads, some with yeast and some with sourdough starter. Where the commercial baker has to strive for uniformity and consistency of product, that won’t be your concern or mine. We can be free to explore and innovate, and there’s no need for our loaves to have the appearance of being cloned from a previous loaf. An oven made of earth and a fire made from burning wood combine to produce breads most rustic and appealing. If you live where the weather in the winter becomes overwhelming, with too many snowdrifts to surmount, and your firewood is somehow lost under the snow bank, then you might want to stay in the house and bake breads in your conventional oven. Yes, it’s okay to be the baker who came in from the cold. An indoor technique that I use is called baking undercover, and I believe you’ll find breads made this way can equal and even surpass the loaves you make in your outdoor wood-fired oven. What you gain by baking indoors is control. More about this later on. What we won’t be baking indoors is pizza. Pizzas need to be baked on the hearth of a wood-fired oven where the floor temperature is about 700ºF. You can’t attain these temperatures in a conventional oven. A bake stone in a conventional oven helps, but it’s only a compromise. Pizzas need to be kissed by fire. It is the fire that gives pizza that rustic quality. To help you decide what type of oven to build, refer to the photo gallery section at the end of this book. There, you’ll find ovens from the conventional to the bizarre, and I know your imagination will be stimulated. 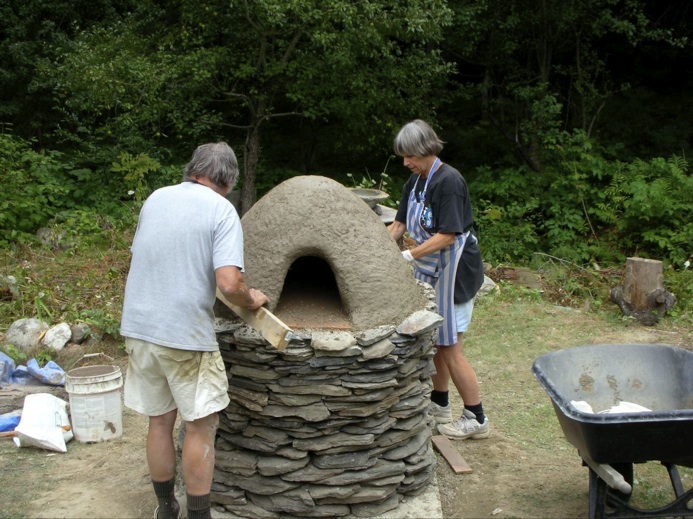
|
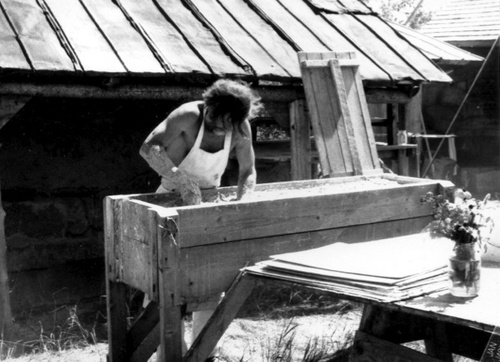
Peter Schumann at the sourdough trough
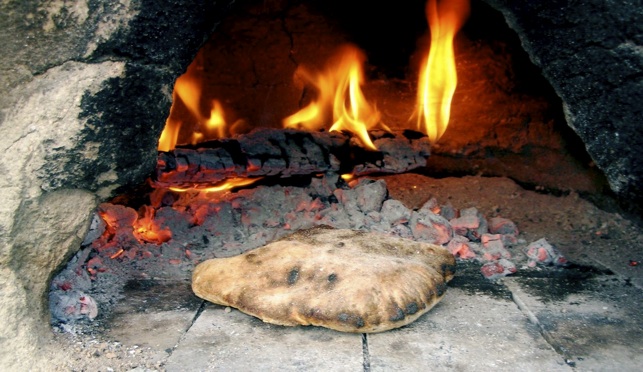
pita in wood-fired oven
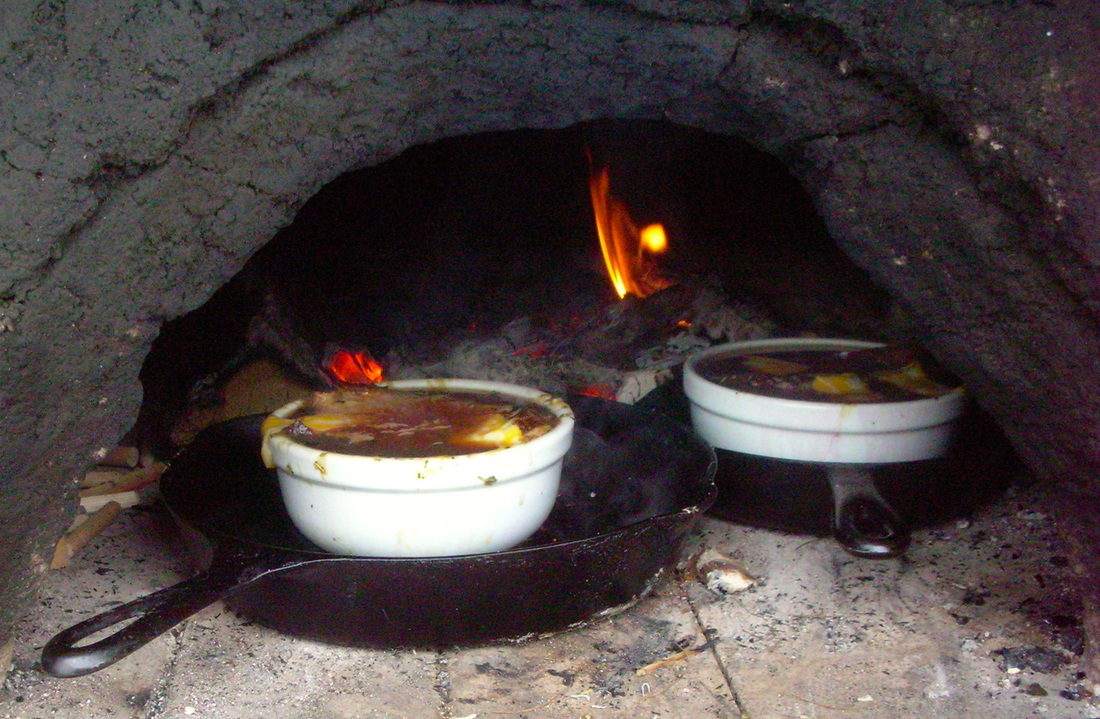 French Onion Soup in the wood-fired oven
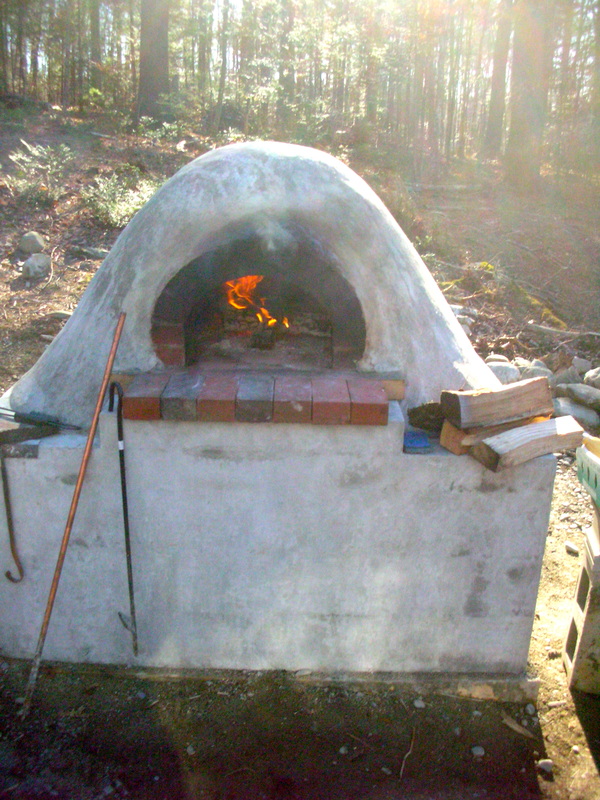
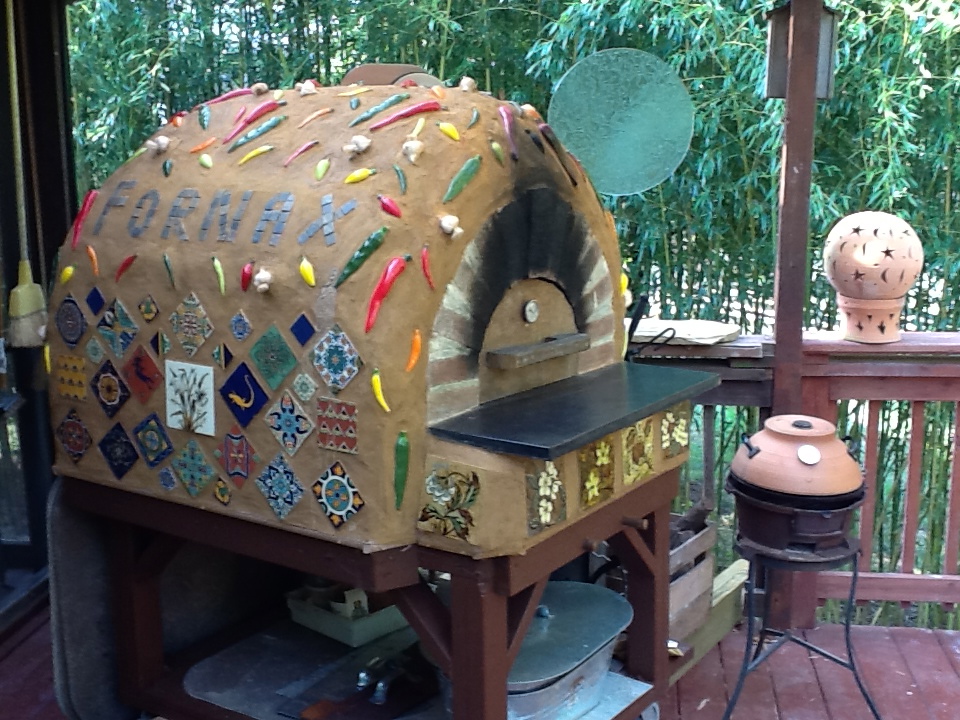 Hall Kern's delightful wood-fired oven
